In this blog, we will show you how to install and setup Kali linux on the new Raspberry Pi 400 Personal Computer.

Hardware List
- Raspbery Pi 400
- Micro SD Card
- PowerSupply
- Ethernet/Rj45 Cord
- Mouse ~{- )
Installing Kali Linux on your Raspberry Pi 400
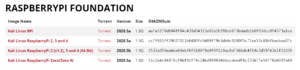
- To begin, we need to first download the latest Kali linux image from the official Kali arm downloads page.
On the kali download page select the latest image "Kali Linux RaspberryPi 2 (v1.2), 3 and 4 (64bit)" from their website.
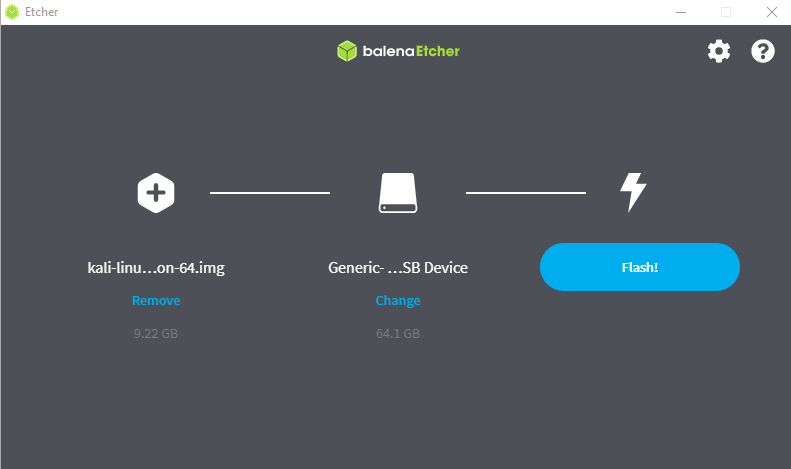
- Writing your Kali image to an SD card, we can utilizing a software called "Etcher".
Etcher is a piece of software that allows your to easily flash OS images to SD cards & USB drives easily.

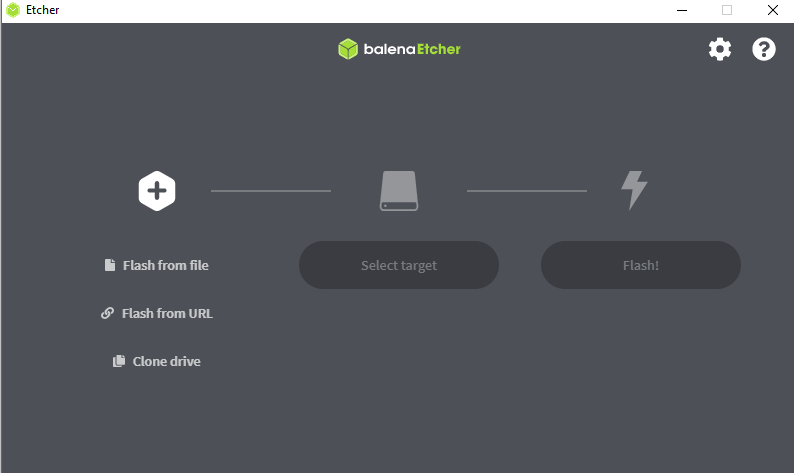
- Begin by opening up the Etcher software application on your device. With Etcher click the "Select Image" button and navigate to your Kali image "kali-linux-2020.3b-rpi3-nexmon-64.img" file location.

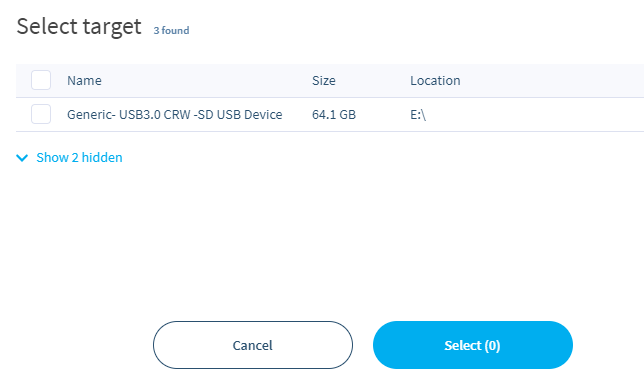
- Next, click on the select target "SD Card" that is ready to be flashed with latest image.

- To write the image to your selected SD card, click on "Flash!" The flash process can take some time, be patient as it validates and writes the image to your SD Card.
Once this process has been completed, your SD card will have the latest Kali ARM image installed. Insert the SD card into the Pi400, and follow the bootup order instructions on the Raspberry Pi400.
Kali Linux Interface Defaults
- Kali is a linux distribution that is primarily designed for ethical hacking. It was first released back in March 2013 and is still developed and maintained by Offensive Security. If you are unaware of the Kali linux distribution I highly recommend doing research to learn more about the capabilities and features that exist within the distribution.
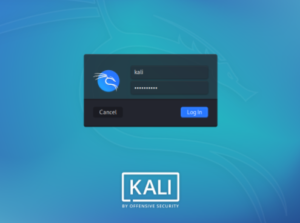
- The Kali linux distribution for the Raspberry Pi comes with a GUI, so you are not required to interact with it purely using SSH, but that option is always available. Once you boot the Pi400, it will load the Kali operating system, you will be greeted by the following login screen. You can use the default username "kali" and the password "kali" - all lowercase
- Upon logging into Kali linux on your Raspberry Pi 400, you will land on the default desktop interface. From this interface, you can easily interact to find all the available applications that are installed on Kali by default. Feel free to explore kali to learn all the things Kali.
- Also, remember the first thing you want to do after logging into your Raspberry Pi 400 is to change the default credentials from "kali" to your designated credentials. To do this, you will need to run the following command:
passwd
After, running this command, you will be prompted to change your current password on the current account you are authenticated into.
- Now you are all setup and running kali on your Raspberry Pi400. Enjoy!

References:
- [1]. Kali ARM linux Image - https://www.offensive-security.com/kali-linux-arm-images/
- [2]. Raspberry Pi 400 - https://www.raspberrypi.org/products/raspberry-pi-400/
- [3]. Etcher Flash Software by Balena - https://www.balena.io/etcher/
- [4]. Kali Linux Distro - https://www.kali.org/